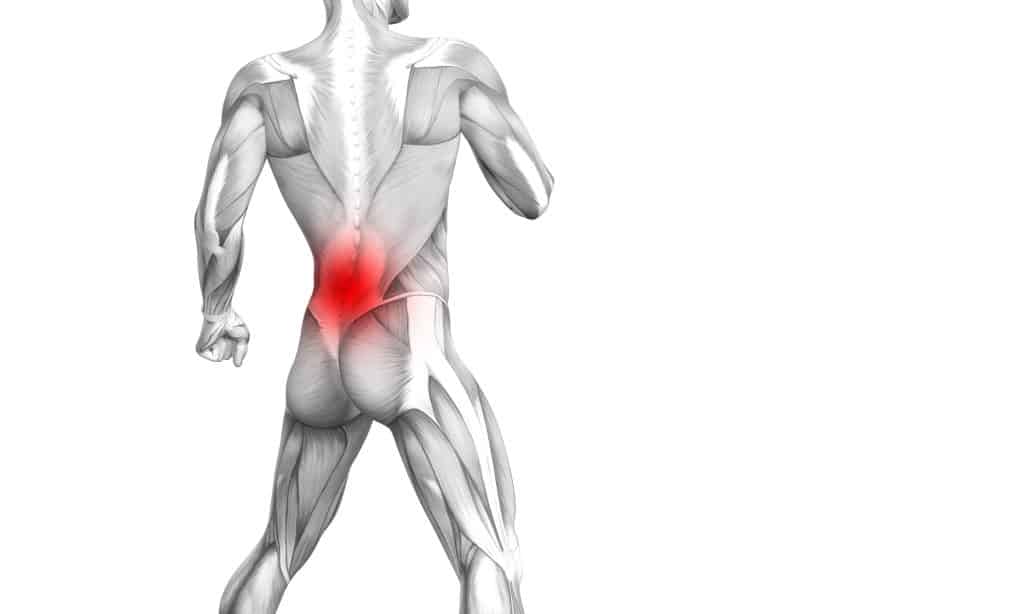
A couple of years ago, I injured my lower back. Just one rep too many on the deadlifts, and I felt that unmistakable “pop” and unbearable pain. Believing the best thing to do was rest—I resolved to drop my gym sessions to recuperate.
A week later—I am in the gym working out again!
The path to was recovery shockingly unconventional.
This article reveals the fastest way to recover from a lower back injury.
Causes of Lower Back Injury
At some period in your life, the statistics show you’re going to experience back pain. A recent report from NINDS (National Institute of Neurological Disorders and Stroke) indicates that over 80 percent of us endure lower back problems during our lives.
Which usually means a trip to the doctor.
Luckily, research has shown that 85 percent of us who visit our clinician with lower back issues aren’t suffering from significant spine abnormalities or serious disease.
Instead—we’ve simply hurt our backs.
Injuries occur as your back is a complex mixture of bones, tendons, ligaments, nerves, and muscles working in unison to provide stability to your upper body. If just one part of this multifaceted structure is damaged—the whole system is thrown out of kilter.
Most symptoms arise from damaged muscles and tendons. Stretching, overworking, or even underusing them leads to tension and ultimately, small tears.
The most common causes include:
- Lifting heavy loads—including dumbbells and barbells.
- Lack of exercise leading to weak muscles which strain under pressure.
- Sitting in one position for an extended period.
- Falling over.
However, while a lower back injury is the most common cause of pain—that’s not always the case.
In rare circumstances, it can be the result of tumors, arthritis, and fractures. If your symptoms continue for more than one week—seek the advice of a health practitioner.
Symptoms of Lower Back Injury
While particular symptoms, and their intensity, vary from person to person—typical signs of lower back injury include:
- Discomfort when sitting or standing—or moving from one position to the other.
- Stiffness.
- An uncomfortable feeling in the buttocks and/or backs of the thighs.
- Soreness in the lower back.
- Pain when sneezing, coughing, and stretching.
If you experience any sensations of numbness—check this out with your doctor as it can be a sign of nerve damage.
Keeping Active and the “Resting” Myth
As I mentioned at the beginning of this article—when I experienced a problem after lifting—my first response was to rest.
After all, that’s what people tell us, right?
It can be easy to enter panic mode when you feel a sharp pain in your back. Your mind races through the awful problems it’s going to cause—how are you going to work, exercise, or even carry your kids?
So, you decide to drop the gym, take some time off, and lay flat on your back for a few days.
It’s the worst action (or inaction) to take.
A recent study indicates that physicians only suggest bed rest in a minority of cases. Evidence shows that resigning yourself to a period of inactivity isn’t just ineffective at relieving lower back injury. It can also elongate the recovery time.
The answer—don’t feel sorry for yourself—get mobile.
Sure, in the first few days you probably won’t feel like it. Stiffness and soreness devils will try and discourage you from exercising.
Ignore them.
Scientific research illustrates that back-specific exercises speed up recovery time and help to alleviate pain. Those who trained after incurring a lower back injury increased their mobility, returned to work sooner, and experienced less discomfort. More so than those who did no exercise at all.
Movement not only relieves tense and painful muscles—but it also improves blood flow. More oxygen and nutrients are delivered to the tendons and muscles—essential for protein synthesis—that is, enabling them to repair and rebuild.
So, if you experience that sharp pain associated with a lower back injury when training—here’s my advice:
1. DON’T PANIC—it’s not the end of the world.
2. Keep moving—avoid getting your partner/friends to become quasi-servants.
3. Consider recovering from your lower back injury as a challenge.
4. Start a daily lower back workout program as detailed below.
Lower Back Injury Workout To Recover FAST
Below is an effective workout to put you on the path to a speedy recovery. Employ this plan for at least one week—completing it daily in its entirety.
If there are no signs of improvement after seven days—consult with your health practitioner.
1. Floor Lifts
This exercise includes three stages—each one stretching the lower back a little more.
Stage 1
- Lay face down on the floor—feet and legs together, arms tight to the side of your body.
- Raise your head slightly to elevate it off the ground—looking forwards.
- Hold for one minute.
Stage 2
- Place your forearms flat on the floor, level with your shoulders—fingers pointing forward. They should form a 90-degree angle with the upper arm.
- Use this position to elevate your chest off the ground.
- Hold for one minute.
Stage 3
- Place palms on the floor beneath your shoulders.
- Extend the arms just short of being locked—lifting the majority of your chest from the ground.
- Your groin, legs, and feet should remain in contact with the floor.
- Hold for one minute.
Repeat all stages four times.
2. Rocking Full Tuck
- Begin by laying on your back.
- Bring the knees as high up your chest as you can manage.
- Grasp both knees with the corresponding hand until you are in a full tuck position—elbows tight to your sides.
- Hold for 30 seconds.
- Gently begin to roll forward and backward on the spot—slow, smooth movements.
- Do this for a further 30 seconds.
- Repeat three more times—with a one-minute break between each.
3. Side Corkscrew Stretch
- Lay with your back on the floor, legs straight.
- Bring your left knee up to your chest and grasp with your opposite hand.
- Pull your knee across your body towards the right-hand side.
- Extend your left arm along the floor at a right angle to your body.
- Hold for 15 seconds.
- Slowly return to the starting position.
- Perform with your right leg and left hand.
- Complete this exercise four times on both sides.
4. The Table Stretch
For this exercise, you’ll need some form of support, such as a chair back. The key is it should be at waist height.
- Stand facing the back of the chair at a distance of about 3 feet.
- Bend forward at the hips and grasp the chair—using it for support—until your back is at a 90-degree angle to your legs.
- Place your forehead on the chair back—with your spine as straight as possible.
- Hold for 15 seconds.
- Tuck your chin in slightly towards your chest and arch your back.
- Hold for another 15 seconds.
- Straighten your spine again and hold for 15 seconds.
- Complete the procedure 10 times.
If you’re comfortable during this exercise—a slight variation can be made to increase flexibility.
- Assume the 90-degree position, as explained in steps two and three above.
- Hold for 15 seconds.
- Release your grip on the chair, swinging your arms straight upwards—using their momentum to return your body to an upright position.
- Hold arms vertically above your head towards the ceiling.
- Keep this position for 15 seconds.
- Repeat 10 times.
5. Toe Touch
- Stand up straight—feet slightly apart.
- Place the palms of your hands on your upper thighs.
- Slide your hands down your legs toward your feet until you reach the lowest position possible—touching your toes if you can.
- Hold for five seconds.
- Slowly return to an upright position again sliding your hands up your legs.
- Repeat 10 times.
6. Hyperextension
These last two exercises are optional as they require gym equipment. If you don’t have access to fitness facilities—they can be dropped from the workout.
Equipment required: Hyperextension machine.
- Stand on the hyperextension apparatus—adjust so your hips are slightly above the top of the machine.
- Cross your arms on your chest.
- Slowly bend forwards to the lowest position possible—it should take around 1-2 seconds.
- Return to the starting position again and repeat 10 times.
- Throughout this exercise keep the back straight—don’t arch. Additionally, in the fully upright position, your spine should form a continuous line with your legs—avoid overextending backward.
7. Hanging Twists
Equipment required: Pull-up bar.
- Set the pull-up bar to a height that allows you to stand on tiptoes with your arms in full extension.
- Facing forward—grasp the bars.
- Pull the head down between the shoulders.
- Hold for 15 seconds.
- Twist to the left—extending your right foot in front of you and your left foot behind you. Remain in contact with the floor throughout.
- Hold for 15 seconds.
- Repeat this action on your right-hand side.
- Complete this full procedure 15 times.
Lower Back Injury and Weightlifting
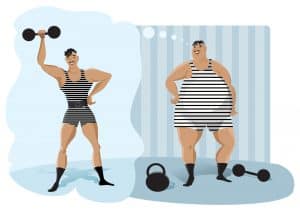
If you’re a dedicated bodybuilder—your chances of incurring a lower back injury are higher compared to that of, say, a HIIT (High-Intensity Interval Training) enthusiast.
The large forces involved—combined with a relatively stationary position—place the back under enormous stress. Deadlifts and squats are the usual culprits.
Naturally, you’re going to be concerned about losing your previously hard-earned gains. While remaining active is essential, going back to lifting 300 pounds straight after experiencing a lower back injury isn’t productive.
Here’s my four-point plan for getting back into bench-ready shape:
1. Follow the workout above for four days—no lifting allowed.
2. Continue with the program for a further three days but include additional air lifts. That is, going through the squat, deadlift, or pressing motions—but with no weights.
3. After one week drop the workout and replace it with light lifting—around 25 percent of your usual comfortable weight.
4. Build up by around 10-15 percent of weight every three days until you reach your previous levels.
You have to face facts—you’re going to lose some mass and power. However, this step-by-step approach is more successful than pushing your lower back injury too hard—with counterproductive results.
Additional Lower Back Recovery Tips
The ideal way to recover from a lower back injury is to use the above workout. If you want to speed up the process—and reduce discomfort—here are some other valuable suggestions.
1
Fire and Ice
These two extremes are excellent methods of improving your lower back injury symptoms—but only when performed in the right order.
Ice should be applied as soon as possible after incurring your trauma. It helps to reduce inflammation, which promotes recovery, relieves tension, prevents spasms, and eases the pain.
Wrap an ice pack, a bag of ice, or even some frozen vegetables in a thin towel. Apply to the affected area and leave it in place for 20 minutes. You should do this at least three times a day—or whenever you feel significant discomfort.
Continue this process for two additional days. During this time, under no circumstances, use heat as it can elevate inflammation and worsen the situation.
From the fourth day onwards drop the ice and apply heat. You can use a hot shower or a hot water bottle, heat pack, or heating pad. Again, leave in place for 20 minutes and repeat three times per day.
2
Avoid Extreme Activity
While remaining mobile is essential for recovery—taking it to the max is liable to exacerbate your lower back injury. HIIT, CrossFit, and contact sports are definite no-nos.
After following the workout above for one week—gradually reintroduce your “normal” training routine or sports to your program.
3
Lower Back Support
There’s some evidence that back supports, especially those that provide compression, can elevate muscle healing rates and lower pain.
However, ideally, they should only be used as a short term measure. Relying on supports too extensively can weaken muscles—which are then more liable to injury.
Summary
Don’t consider a lower back injury as a burden—it’s a challenge.
Sitting back, feeling sorry for yourself, and avoiding movement isn’t going to put you back on the road to recovery. It’s going to slow you down.
Instead, be proactive.
To the best of your ability, without straining yourself, follow your regular daily routine. Additionally, utilize the above exercises to increase strength, improve mobility, and promote healing.
Pursue this plan—and you’ll rapidly be back to your usual zestful self.